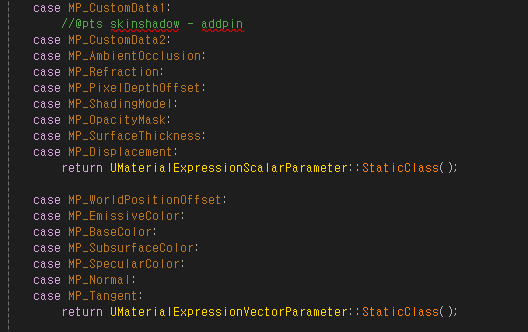
머터리얼에 보통 커스텀 데이터 0번과 1번을 이용해 핀이름을 변경하고 활성화 하는 방법을 사용하게됩니다
하지만 핀을 기본적으로 많이 사용하는 쉐이딩 모델은 핀을 추가하거나 커스텀 아웃풋을 사용하게되는데요
저도 커스텀 아웃풋을 사용해보지 않아 핀을 추가하는 방식을 기록으로 남깁니다.
기본적으로 아예 새로운 핀을 추가하는것은 상당히 코드변경을 많이 하므로 예전부터 꼭 필요하지 않으면
안하곤 했는데
5.44버전은 훨씬더 많아진것 같아 앞으로는 커스텀 아웃풋을 사용하는 방식으로 변경 할 것 같습니다.
아예 새로운 핀을 추가하기위해서는 지버퍼와 씬타잎에 우선적으로 선언을 한뒤 열심히 다른 핀의 데이터(보통 커스텀데이터 1번)를 찾아 가며
연결해 주면 됩니다.
우선 타잎을 추가해 줍니다
타잎 추가
SceneTypes.h
MP_SurfaceThickness UMETA(Hidden),
//@pts skinshadow
MP_CustomData2 UMETA(Hidden),
//^^^ New material properties go above here ^^^^
MP_MaterialAttributes UMETA(Hidden),
MP_CustomOutput UMETA(Hidden),
MP_MAX UMETA(DisplayName = "None"),
};
/** Blend modes supported for simple element rendering */
mp를 추가해준뒤
MP_MAX 를 검색해준뒤 버전에따라 1개를 추가했으면 1을 더해줍니다.
5.44에는 mpmax 가 35기에 36로 변경
검색하시면 저렇게 상수로 되어있는 부분이 3군대정도 존재 합니다.


지버퍼에 데이터 타잎 추가
GBufferInfo.h
GBS_ClearCoatRoughness, // R8
//@pts skinshadow
GBS_SkinShadow,// R8
GBS_HairSecondaryWorldNormal, // RG8
쉐이더 맵에 스킨쉐도우 추가
MaterialShared.h
namespace EMaterialShaderMapUsage
{
enum Type
{
Default,
LightmassExportEmissive,
LightmassExportDiffuse,
LightmassExportOpacity,
LightmassExportNormal,
MaterialExportBaseColor,
MaterialExportSpecular,
MaterialExportNormal,
MaterialExportTangent,
MaterialExportMetallic,
MaterialExportRoughness,
MaterialExportAnisotropy,
MaterialExportAO,
MaterialExportEmissive,
MaterialExportOpacity,
MaterialExportOpacityMask,
MaterialExportSubSurfaceColor,
MaterialExportClearCoat,
MaterialExportClearCoatRoughness,
//@pts Customskin
MaterialExportSkinShadow,
MaterialExportCustomOutput,
사용할 프로퍼티 추가
에디터에서 사용할 프로퍼티 선언
Material.h
/** */
UPROPERTY()
FScalarMaterialInput ClearCoat;
/** */
UPROPERTY()
FScalarMaterialInput ClearCoatRoughness;
//@pts SkinShadow
UPROPERTY()
FScalarMaterialInput SkinShadow;
/** output ambient occlusion to the GBuffer */
UPROPERTY()
FScalarMaterialInput AmbientOcclusion;
머터리얼 익스프레션에서 사용할 어트리뷰트 선언
MaterialExpressionMakeMaterialAttributes.h
UPROPERTY()
FExpressionInput ClearCoatRoughness;
//@pts SkinShadow
UPROPERTY()
FExpressionInput SkinShadow;
UPROPERTY()
FExpressionInput AmbientOcclusion
MaterialTemplate.ush
이부분이 검색으로 찾다보면 약간 놓치기 쉬운 부분인데
새로운 핀(커스텀데이터)를 가져오는 함수 추가를 해주어야 합니다.
해당 함수는 원래 코드는
half GetMaterialCustomData1(in out FMaterialPixelParameters Parameters)
{
%s;
}
//@pts skinshadow
half GetMaterialCustomData2(in out FMaterialPixelParameters Parameters)
{
%s;
}
이런형태여서 더욱 찾기가 어렵습니다.
5.44에서 변경되어 조금더 쉽게 찾을 수 있을것 같습니다.
변경된 형태

나중에 다시 나오겠지만 해당 함수를 실제로 만드는 부분도 전부 변경이 있었습니다.

이후부터는 별도의 설명이 없이 변경해야할 부분만 정리해둔것도 많은데 전체적으로 수정하다보면 머터리얼의 정보를 어떻게 파라메터로 넘기는지 알 수 있을것 입니다.
ExportMaterialProxy.h
이름에서 보듯이 머터리얼에서 사용한 각 프로퍼티를 컴파일러에 넘겨줍니다.
switch (PropertyToCompile)
{
case MP_EmissiveColor:
case MP_BaseColor:
case MP_Specular:
case MP_Roughness:
case MP_Anisotropy:
case MP_Metallic:
case MP_AmbientOcclusion:
case MP_Opacity:
case MP_OpacityMask:
case MP_CustomData0:
case MP_CustomData1:
//@pts skinshadow
case MP_CustomData2:
case MP_SubsurfaceColor:
return MaterialInterface->CompileProperty(&ProxyCompiler, PropertyToCompile, ForceCast_Exact_Replicate);
case MP_Normal:
..
..
// Override with a special usage so we won't re-use the shader map used by the material for rendering
case MP_CustomData1: ResourceId.Usage = EMaterialShaderMapUsage::MaterialExportClearCoatRoughness; break;
//@pts skinshadow
case MP_CustomData2: ResourceId.Usage = EMaterialShaderMapUsage::MaterialExportSkinShadow; break;
MaterialEditor.cpp
머터리얼 에디터에서 핀의 아이디를 확인하는 절차가 있습니다.
UClass* FMaterialEditor::GetOnPromoteToParameterClass(const UEdGraphPin* TargetPin) const
{
UMaterialGraphNode_Root* RootPinNode = Cast<UMaterialGraphNode_Root>(TargetPin->GetOwningNode());
UMaterialGraphNode* OtherPinNode = Cast<UMaterialGraphNode>(TargetPin->GetOwningNode());
if (RootPinNode != nullptr)
{
EMaterialProperty propertyId = (EMaterialProperty)FCString::Atoi(*TargetPin->PinType.PinSubCategory.ToString());
switch (propertyId)
{
case MP_Opacity:
case MP_Metallic:
case MP_Specular:
case MP_Roughness:
case MP_Anisotropy:
case MP_CustomData0:
case MP_CustomData1:
//@pts skinshadow
case MP_CustomData2:
--

PixelInspectorDetailsCustomization.cpp
새로운 쉐이딩 모델을 추가한 경우가 아니라면
해당 쉐이딩 모델에서 기본 외의 프로퍼티를 사용하지 않는 경우 하이드를 하도록 되어 있습니다.
저는 서브서피스프로파일에 적용했기때문에 필요한 핀을 다시 켜주었습니다.
void FPixelInspectorDetailsCustomization::CustomizeDetails(IDetailLayoutBuilder& DetailBuilder)
함수 내부에 있습니다.

위 리스트의 프로퍼티들을 별도로 온오프를 진행합니다.
case MSM_SubsurfaceProfile:
{
//@pts skinshadow
DetailBuilder.HideProperty(SubSurfaceColorProp);
DetailBuilder.HideProperty(ClearCoatProp);
//@pts skinshadow
//DetailBuilder.HideProperty(ClearCoatRoughnessProp);
DetailBuilder.HideProperty(WorldNormalProp);
DetailBuilder.HideProperty(BackLitProp);
DetailBuilder.HideProperty(ClothProp);
DetailBuilder.HideProperty(EyeTangentProp);
DetailBuilder.HideProperty(IrisMaskProp);
DetailBuilder.HideProperty(IrisDistanceProp);
}
MaterialGraph.cpp
머터리얼 부가 설명을 추가해주는 부분
이부분은 안넣어도 될것같지만 추가해주었습니다 핀에 마우스를 올리면 나오는 툴팁을 설정해 줍니다.
MaterialInputs.Add(FMaterialInputInfo(FMaterialAttributeDefinitionMap::GetDisplayNameForMaterial(MP_CustomData2, Material), MP_CustomData2, FMaterialAttributeDefinitionMap::GetDisplayNameForMaterial(MP_CustomData2, Material)));
//^^^ New material properties go above here. ^^^^
MaterialInputs.Add(FMaterialInputInfo(LOCTEXT("MaterialAttributes", "Material Attributes"), MP_MaterialAttributes, LOCTEXT("MaterialAttributesToolTip", "Material Attributes")));
HLSLMaterialTranslator.cpp
머터리얼 함수를 생성해주는 부분입니다.
Chunk[MP_CustomData0] = Material->CompilePropertyAndSetMaterialProperty(MP_CustomData0, this);
Chunk[MP_CustomData1] = Material->CompilePropertyAndSetMaterialProperty(MP_CustomData1, this);
//@pts skinshadow
Chunk[MP_CustomData2] = Material->CompilePropertyAndSetMaterialProperty(MP_CustomData2, this);
프로퍼티 컴파일을 하고
아래부분이 맨위에서 나왓던 형식으로 바뀐듯합니다.
원래 이전버전에서는 코드를 생성하는 방식에서 텍스트를 직접 코들로 넣는 방식으로 변경한것 같습니다
LazyPrintf.PushParam(!bEnableExecutionFlow ? *GenerateFunctionCode(MP_CustomData0, BaseDerivativeVariation) : TEXT("return 0.0f"));
LazyPrintf.PushParam(!bEnableExecutionFlow ? *GenerateFunctionCode(MP_CustomData1, BaseDerivativeVariation) : TEXT("return 0.0f"));
//@pts skinshadow
LazyPrintf.PushParam(!bEnableExecutionFlow ? *GenerateFunctionCode(MP_CustomData2, BaseDerivativeVariation) : TEXT("return 0.0f"));
5.44버전
MaterialSourceTemplateParams.Add({ TEXT("get_material_custom_data1"), !bEnableExecutionFlow ? *GenerateFunctionCode(MP_CustomData1, BaseDerivativeVariation) : TEXT("return 0.0f") });
//@pts skinshadow addpin
MaterialSourceTemplateParams.Add({ TEXT("get_material_custom_data2"), !bEnableExecutionFlow ? *GenerateFunctionCode(MP_CustomData2, BaseDerivativeVariation) : TEXT("return 0.0f") });
Material.cpp
쉐이딩 모델에 따라 활성화 할 핀 제어
case MP_SubsurfaceColor:
Active = ShadingModels.HasAnyShadingModel({ MSM_Subsurface, MSM_PreintegratedSkin, MSM_TwoSidedFoliage, MSM_Cloth });
break;
case MP_CustomData0:
Active = ShadingModels.HasAnyShadingModel({ MSM_ClearCoat, MSM_Hair, MSM_Cloth, MSM_Eye, MSM_SubsurfaceProfile });
break;
//@pts SkinShadow
case MP_CustomData1:
Active = ShadingModels.HasAnyShadingModel({ MSM_ClearCoat, MSM_Eye, MSM_SubsurfaceProfile });
break;
case MP_CustomData2:
Active = ShadingModels.HasAnyShadingModel({ MSM_SubsurfaceProfile});
break;
비슷하게 쉐이딩 모델에 따라 핀을 활성화 하는부분이 여러개 있는데(슬롯 활성 비활성도 마찬가지) 전부 맞춰서 켜주셔야 정상적으로 값이 전달이 됩니다.
void UMaterial::PostLoad()
{
..
..
DoMaterialAttributeReorder(&EditorOnly->ClearCoatRoughness, UEVer, RenderObjVer, UE5MainVer);
//@pts skinshadow -addpin
DoMaterialAttributeReorder(&EditorOnly->SkinShadow, UEVer, RenderObjVer, UE5MainVer);
..
..
case MP_CustomData1: SetMaterialInputDescription(EditorOnly->ClearCoatRoughness, false, OutDescription); return true;
//@pts SkinShadow
case MP_CustomData2: SetMaterialInputDescription(EditorOnly->SkinShadow, false, OutDescription); return true;
..
..
case MP_CustomData1: return EditorOnly->ClearCoatRoughness.CompileWithDefault(Compiler, Property);
//@pts SkinShadow
case MP_CustomData2: return EditorOnly->SkinShadow.CompileWithDefault(Compiler, Property);
5.44에 추가된 필드 맨 마지막에 있습니다
UMaterialEditorOnlyData::UMaterialEditorOnlyData()
{
BaseColor.Constant = FColor(128, 128, 128);
Metallic.Constant = FMaterialAttributeDefinitionMap::GetDefaultValue(MP_Metallic).X;
Specular.Constant = FMaterialAttributeDefinitionMap::GetDefaultValue(MP_Specular).X;
..
..
//@pts skinshadow -addpin
SkinShadow.Constant = FMaterialAttributeDefinitionMap::GetDefaultValue(MP_CustomData2).X;
AmbientOcclusion.Constant = FMaterialAttributeDefinitionMap::GetDefaultValue(MP_AmbientOcclusion).X;
..}
MaterialAttributeDefinitionMap.cpp
어트리 뷰트 맵에 추가
Add(FGuid(0xBE4F2FFD, 0x12FC4296, 0xB0124EEA, 0x12C28D92), TEXT("ClearCoatRoughness"), MP_CustomData1, MCT_Float, FVector4(.1,0,0,0), SF_Pixel);
//@pts skinshadow
Add(FGuid(0xBE4F2FFD, 0x3C8F48FA, 0x9D777BEE, 0x12C28D92), TEXT("SkinShadow"), MP_CustomData2, MCT_Float, FVector4(1,0,0,0), SF_Pixel);
또한 커스텀핀의 머터리얼 노출 이름을 지정해주는 부분이 있습니다.
case MP_CustomData1:
CustomPinNames.Add({ MSM_ClearCoat, LOCTEXT("ClearCoatRoughness", "Clear Coat Roughness").ToString() });
CustomPinNames.Add({ MSM_Eye, LOCTEXT("IrisDistance", "Iris Distance").ToString() });
CustomPinNames.Add({ MSM_SubsurfaceProfile, LOCTEXT("FinalSpOffset", "FinalSpOffset").ToString() });
return FText::FromString(GetPinNameFromShadingModelField(Material->GetShadingModels(), CustomPinNames, LOCTEXT("CustomData1", "Custom Data 1").ToString()));
//@pts skinshadow -addpin
case MP_CustomData2:
return LOCTEXT("FinalSpContrast", "FinalSpContrast");
저는 커스텀 데이터1은 FinalSpOffset 2는 FinalSpContrast 로 처리를 해주었습니다.
MaterialExpressionHLSL.cpp
AttributesExpression = SetAttribute(Generator, Scope, MP_CustomData1, ClearCoatRoughness, AttributesExpression);
//@pts skinshadow
AttributesExpression = SetAttribute(Generator, Scope, MP_CustomData2, SkinShadow, AttributesExpression);
MaterialCachedData.cpp
함수 이름이 어트리뷰트 컨디션을 설정하는걸로 봐서는 해당 데이터가 실제 사용할 준비가 되어 있는지 확인하는것 같습니다.
SetMatAttributeConditionally(EMaterialProperty::MP_CustomData1, MakeMatAttributes->ClearCoatRoughness.IsConnected());
//@pts skinshadow
SetMatAttributeConditionally(EMaterialProperty::MP_CustomData2, MakeMatAttributes->SkinShadow.IsConnected());
MaterialExpressions.cpp
FExpressionInput* UMaterialExpressionMakeMaterialAttributes::GetExpressionInput(EMaterialProperty InProperty)
이란 함수내부에 있는 스위치문에 추가해줍니다
mp에 따라 포인터를 반환해주고 있네요
case MP_CustomData0: return &ClearCoat;
case MP_CustomData1: return &ClearCoatRoughness;
//@pts skinshadow
case MP_CustomData2: return &SkinShadow;
default: break; // We don't support this property.
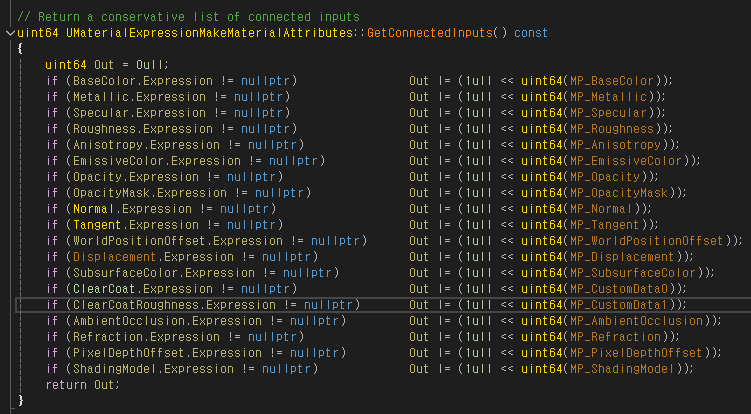
이전에 없던 부분이 추가되었음

비트연산으로 해당 커넥션이존재하는지 확인하는듯합니다(깊이 들어가서 보지 않아서 확실하지 않습니다)
결국 바로 위에서 추가한 커넥션으로 어트리뷰트를 설정하는 부분에서 사용하는 것 같습니다.
case MP_CustomData1: Ret = ClearCoatRoughness.Compile(Compiler); Expression = ClearCoatRoughness.Expression; break;
//@pts skinshadow
case MP_CustomData2: Ret = SkinShadow.Compile(Compiler); Expression = SkinShadow.Expression; break;
이후 컴파일러에게 함수를 컴파일 하도록 처리합니다.
추가
Outputs.Add(FExpressionOutput(TEXT("ClearCoatRoughness"), 1, 1, 0, 0, 0));
//@pts CustomSkin shader
Outputs.Add(FExpressionOutput(TEXT("SkinShadow"), 1, 1, 0, 0, 0));
Outputs.Add(FExpressionOutput(TEXT("AmbientOcclusion"), 1, 1, 0, 0, 0));
이후 프로퍼티를 추가한뒤 기존프로퍼티들은 인덱스를 변경
피씨나 안드로이드에서는 맨뒤에 추가해도 되긴합니다만
ios 에서 순서가 틀리면 오류가 나는 이슈가 있어 왠만하면 위치를 맞춰주는게 좋습니다.
PropertyToIOIndexMap.Add(MP_PixelDepthOffset, 24);
//@pts skinshadow
PropertyToIOIndexMap.Add(MP_CustomData2, 25);
PropertyToIOIndexMap.Add(MP_ShadingModel, 26);
//PropertyToIOIndexMap.Add(MP_ShadingModel, 25);
MaterialHLSLEmitter.cpp
머터리얼 함수를 생성하는 부분이라 코드가 변경되었습니다(위에도 한번 나왔지만 동일하게 변경됨)
기존
// CustomData0/1 are named ClearCoat/ClearCoatRoughness
LazyPrintf.PushParam(TEXT("return Parameters.MaterialAttributes.ClearCoat"));
LazyPrintf.PushParam(TEXT("return Parameters.MaterialAttributes.ClearCoatRoughness"));
//@pts customskin
LazyPrintf.PushParam(TEXT("return Parameters.MaterialAttributes.SkinShadow"));
// Print custom texture coordinate assignments, should be fine with regular derivatives
변경
// CustomData0/1 are named ClearCoat/ClearCoatRoughness
MaterialSourceTemplateParams.Add({ TEXT("get_material_custom_data0"), TEXT("return Parameters.MaterialAttributes.ClearCoat") });
MaterialSourceTemplateParams.Add({ TEXT("get_material_custom_data1"), TEXT("return Parameters.MaterialAttributes.ClearCoatRoughness") });
//@pts skinshadow addpin
MaterialSourceTemplateParams.Add({ TEXT("get_material_custom_data2"), TEXT("return Parameters.MaterialAttributes.SkinShadow") });
// Print custom texture coordinate assignments, should be fine with regular derivatives
추가된 부분 위에
//if (bCompileForComputeShader)
//{
// LazyPrintf.PushParam(*GenerateFunctionCode(CompiledMP_EmissiveColorCS, BaseDerivativeVariation));
//}
//else
이런식의 구버전 코드가 더미로 주석처리 되어 있음 해당방식보다 안전하고 쉬운 방식으로 변경이 된거같습니다.
ShaderGenerationUtil.cpp
문서 맨처음 지버퍼 슬롯을 추가를 해준부분이 있습니다

해당 슬롯을 사용하겠다고 명시를 해주어야 합니다.
case MSM_SubsurfaceProfile:
SetSharedGBufferSlots(Slots);
if (bMergeCustom)
{
Slots[GBS_CustomData] = true;
}
else
{
Slots[GBS_SubsurfaceProfile] = true;
Slots[GBS_Opacity] = true;
//@pts skinshadow
Slots[GBS_ClearCoatRoughness] = true;
Slots[GBS_SkinShadow] = true;
}
슬롯의 이름도 지정해주어야 합니다 해당부분은 머터리얼 핀의 이름이 아닌 지버퍼 슬롯의 이름입니다.
case GBS_ClearCoatRoughness:
return TEXT("ClearCoatRoughness");
//@pts skinshadow -addpin
case GBS_SkinShadow:
return TEXT("SkinShadow");
끝
사실 핀 추가는 크게 어려울게 없습니다.
심지어 함수부분이 명시되어있어서 놓치기도 어렵고
기존 다른 코드를 따라가면서 꼼꼼히 추가해주면 되긴하는데 간소하게나마 제가 파악한 수준에서어떠한 기능을 하고
어떠한 이유때문에 추가를 해주어야하나 공유하는 정도라고 봐주시면 되겠습니다
'unreal > UnrealCode' 카테고리의 다른 글
| [Unreal_Editor]5.44 에디터피처레벨 변경시 이벤트 추가하기 (1) | 2026.01.15 |
|---|---|
| [Unreal_Editor]5.44 나이아가라 커스텀 노드 추가 (0) | 2026.01.15 |
| [Unreal_Editor]언리얼 에디터 언어변경 토글버튼 추가(한 / 영) (0) | 2025.02.25 |
| [Unreal_Engine]모바일 디바이스에서 stat 글씨 크기 늘리기 (0) | 2024.04.05 |
| Unreal_애님 블루프린트 최적화 관련 몇가지 코드 (0) | 2023.04.18 |